Hey there! As a supplier of Universal Hardness Testers, I've seen firsthand how valuable these machines are in various industries. But getting the data from a Universal Hardness Tester is just the first step. The real magic happens when you know how to analyze that data effectively. In this blog, I'm gonna walk you through the process of analyzing the data obtained from a Universal Hardness Tester.
Understanding the Basics of Universal Hardness Testing
Before we dive into data analysis, let's quickly go over what a Universal Hardness Tester does. These testers measure the hardness of a material by applying a specific load to an indenter, which then makes an indentation on the material's surface. The size of this indentation is directly related to the material's hardness.
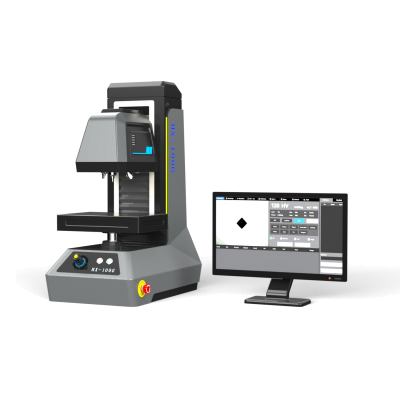
There are different types of Universal Hardness Testers we offer, like the HTBRV - 250 G Electric Universal Hardness Tester, the Electric Dial Display Universal Hardness Tester, and the Weight Load Touch Screen Universal Hardness Tester. Each has its own features and is suitable for different applications.
Step 1: Collecting Accurate Data
The first step in data analysis is to make sure you're starting with good data. When using a Universal Hardness Tester, you need to follow the proper testing procedures. This includes preparing the test specimen correctly. The surface of the specimen should be flat, smooth, and clean. Any roughness or contaminants can affect the test results.
Also, ensure that the indenter is in good condition and the load is applied accurately. Most of our testers are designed to provide precise and repeatable results, but user error can still creep in. Take multiple measurements at different locations on the specimen to get a more representative hardness value.
Step 2: Organizing the Data
Once you've collected the data, it's time to organize it. You can use a simple spreadsheet program like Microsoft Excel or Google Sheets. Create columns for the test location, the load applied, the size of the indentation, and the calculated hardness value.
For example, if you're using the Brinell hardness testing method, the formula to calculate the Brinell hardness number (BHN) is (BHN=\frac{2P}{\pi D(D - \sqrt{D^{2}-d^{2}})}), where (P) is the load in kilograms - force, (D) is the diameter of the indenter ball, and (d) is the diameter of the indentation.
By entering all your data into a spreadsheet, you can easily sort, filter, and perform calculations. This makes it much easier to spot trends or outliers in the data.
Step 3: Identifying Outliers
Outliers are data points that are significantly different from the rest of the data. They can occur due to various reasons, such as a flaw in the test specimen, an error in the testing process, or a malfunction in the hardness tester.
To identify outliers, you can use graphical methods like box - plots or scatter plots. In a box - plot, data points that are outside the whiskers of the box are considered outliers. Once you've identified an outlier, you need to decide whether to include it in your analysis or not. If it's due to a clear error, it's usually best to exclude it.
Step 4: Calculating Averages and Standard Deviations
After dealing with outliers, calculate the average hardness value and the standard deviation. The average gives you a central tendency of the hardness of the material, while the standard deviation measures the variability of the hardness values.
In Excel, you can use the AVERAGE and STDEV functions to calculate these values. A low standard deviation indicates that the hardness values are consistent across the specimen, which is a good sign of material homogeneity. On the other hand, a high standard deviation may suggest that there are variations in the material's composition or structure.
Step 5: Comparing with Standards
Most industries have specific hardness standards for different materials. For example, in the automotive industry, the hardness of engine components needs to meet certain specifications. Compare your calculated hardness values with the relevant industry standards.

If the hardness values are within the acceptable range, it means the material meets the requirements. If they're outside the range, further investigation is needed. This could involve checking the manufacturing process, the quality of the raw materials, or even the calibration of the hardness tester.
Step 6: Analyzing Trends Over Time
If you're testing multiple specimens over a period of time, you can analyze the trends in the hardness data. Plot the hardness values against time or the batch number of the specimens.
This can help you identify if there are any long - term changes in the hardness of the materials. For example, if you notice a gradual decrease in hardness over time, it could indicate a problem with the storage conditions of the materials or a change in the manufacturing process.
Step 7: Using Statistical Analysis Tools
In addition to basic calculations, you can use more advanced statistical analysis tools. For example, regression analysis can be used to determine if there is a relationship between the hardness of the material and other factors such as temperature or humidity during the testing process.
Analysis of variance (ANOVA) can be used to compare the hardness values of different batches of materials or materials from different suppliers. These tools can provide deeper insights into the data and help you make more informed decisions.
Step 8: Communicating the Results
Once you've analyzed the data, it's important to communicate the results effectively. Create clear and concise reports that include the test methods used, the data collected, the analysis performed, and the conclusions drawn.
Use graphs and tables to present the data in a more visual and understandable way. Share the reports with relevant stakeholders, such as quality control managers, engineers, or suppliers. This ensures that everyone is on the same page regarding the quality of the materials.
Step 9: Making Decisions Based on the Analysis
The ultimate goal of data analysis is to make informed decisions. If the hardness values are not meeting the standards, you may need to adjust the manufacturing process, change the raw materials, or perform additional testing.
On the other hand, if the data shows that the materials are of high quality and consistent, you can continue with the current manufacturing and testing procedures.
Why Choose Our Universal Hardness Testers for Data Analysis
Our Universal Hardness Testers are designed to provide accurate and reliable data. They come with advanced features that make data collection and analysis easier. For example, some of our testers have built - in data storage and can export the data directly to a computer.
The touch - screen interfaces on our testers are intuitive, making it easy for operators to input test parameters and view the results. And with our wide range of testers, you can choose the one that best suits your specific testing needs.
Contact Us for More Information
If you're interested in learning more about our Universal Hardness Testers or need help with data analysis, we'd love to hear from you. Whether you're in the manufacturing, aerospace, or any other industry that requires hardness testing, our team of experts can provide you with the support you need.
Don't hesitate to reach out to us for a consultation. We can help you select the right tester for your application, and guide you through the process of data analysis to ensure you get the most out of your testing.
References
- ASTM International. (20XX). Standard test methods for hardness testing.
- ISO Standards. (20XX). International standards for hardness testing.
- Callister, W. D., & Rethwisch, D. G. (20XX). Materials Science and Engineering: An Introduction. Wiley.